Contents
You may find yourself one day looking at your motorcycle and thinking that the chain needs an adjustment. Whether you’ve recently bought a new bike or changed the sprockets on an old one, the chain may need to be a link longer than it is.
Yes, you can add a link to a motorcycle chain. It’s important to have the correct tools and to make sure you are doing this carefully to avoid future injuries and malfunctions. If you’ve never done any bike repair or maintenance, then be sure to talk to an expert before riding off into the sunset.
Adding a link to a motorcycle chain isn’t the most difficult thing to do when it comes to maintenance. However, it is a process that needs to be done absolutely correctly, or you may be setting yourself up for a terrible accident later. We’ll dive deeper into the process of replacing a motorcycle chain and the tools you need to succeed.
What Link Can Be Added To a Motorcycle Chain?
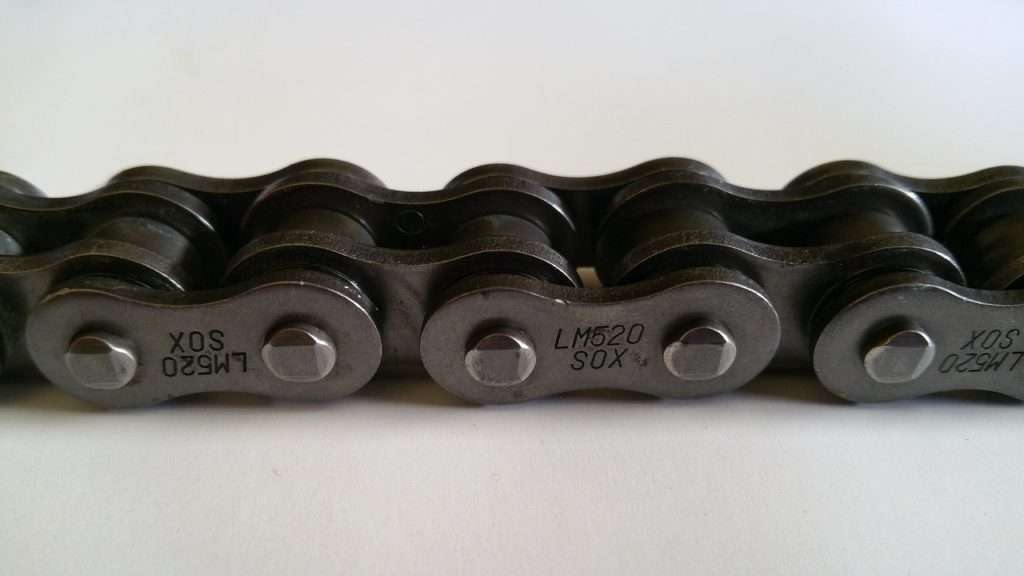
Bike chains are made up of individual links clipped together. Quick links, or master links, are used to connect both ends of the chain and are designed to be placed without the need for a specialized chain tool. You can add master links to a chain to lengthen it if needed.
Some folks recommend that the brand of chain link you buy to add or replace, matches the existing chain links, while others suggest that this isn’t as important. Consistent importance is placed on purchasing the correct type of link, either an o-ring or an x-ring. The big difference is in the style of the seal in each link. O-rings look circular while X-rings resemble an “x.”
Once you’ve determined which kind of link you need, you can go ahead and purchase the new master or quick link from your local bike shop or several online retailers. If you’re unsure just which part to buy, consider bringing your bike to the shop and consulting with the technicians there. Learning to do the repair will save you plenty of money in labor over time.
How To Add a Master Link To a Motorcycle Chain
No products found.
No products found.
Let’s go through the steps to replace or add a master link to your bike chain. First, there are several tools you’ll want to be sure you have handy including:
- Chain Breaker: This is a tool to help remove the old link or create a break to add a new one.
- Chain Press: This secures the pins once you’ve replaced the link.
- Allen Wrench: Needed to tighten the chain press, usually included.
- Pliers: Any standard set of pliers should be fine.
You could also invest in a special master link replacement tool that helps to hold the chain in place while you work, but we’re going to explain the process using the sprocket as your “workbench.”
If you are a bit more of a visual learner, then check out this video right here to replace the master link in your chain. Let’s examine that process step by step.
Use the Chain Breaker to Open Up the Chain
The chain breaker does exactly what the name implies. It breaks open a space in your chain so you can add a new link. Attach the chain breaker to the link you want to remove or separate and tighten the breaker to push the pins out.
It is very important to note that these pins are not reusable once you have pushed them out. They have been weakened and broken by the “chain breaker.” Do not try to reuse this part once removed. You need a fresh link and fresh pins.
Once you’ve opened up the chain, use the rear sprocket on the bike to hold the chain in place, as a sort of workbench. This is a lot easier to work with than trying to pull the chain together in mid air while replacing the link.
Insert the New Master Link To the Opening
Take your newly purchased master link and place it into the now open space between the chain links. Make sure your master link is greased up and the O-rings are correctly installed. Then add the master link to the opening.
Once you’ve settled the master link in the opening, you can roll the chain forward so that the link is no longer resting on top of the sprocket. This will make it easier to put the chain press on and secure the link.
Use the Chain Press to Secure the New Master Link
No products found.
No products found.
Be sure to place the O-rings or X-rings on the outside now that the Master Link is in place. Place the plate covering over the top of these rings. There isn’t typically an in or out to the plate, so don’t worry about which direction you place it on.
The plate is a “press fit” on the pins. This means everything is secured by applying pressure with the chain press. It is super important to make sure that the pins are making even contact with the chain press so you avoid pressing them to the side and creating a problem.
Secure the chain press around the newly installed link. Tighten the bolt in on the top and use an allen wrench to steadily tighten the press. Once you reach a certain point, the press will turn with your tightening. Roll the chain back to the sprocket and allow the sprocket to keep the chain press from twisting while you tighten it.
There is a possibility of over pressing your link. So take it slow and steady to avoid breaking the new link while trying to install it. Once you have tightened the press snugly, go in reverse to remove the press and check your progress.
Install the Clip On the Pins
Once you’ve removed the chain press, you should check to see that the pins are sticking out just enough so that you can install the clip over the top of them.
The open end of the clip goes towards the back. Do not force the clip in place by prying or twisting it in. You will likely break the clip and need a new one.
Line up the clip parallel with the chain link. Use your pliers to get a grip on the edge of the clip and the tip of the front pin. Pull the pliers closed together and it should slide the clip right into place. Remember, if you have to use too much force, then you’re probably not doing it quite right.
Can You Link Two Master Links Together?
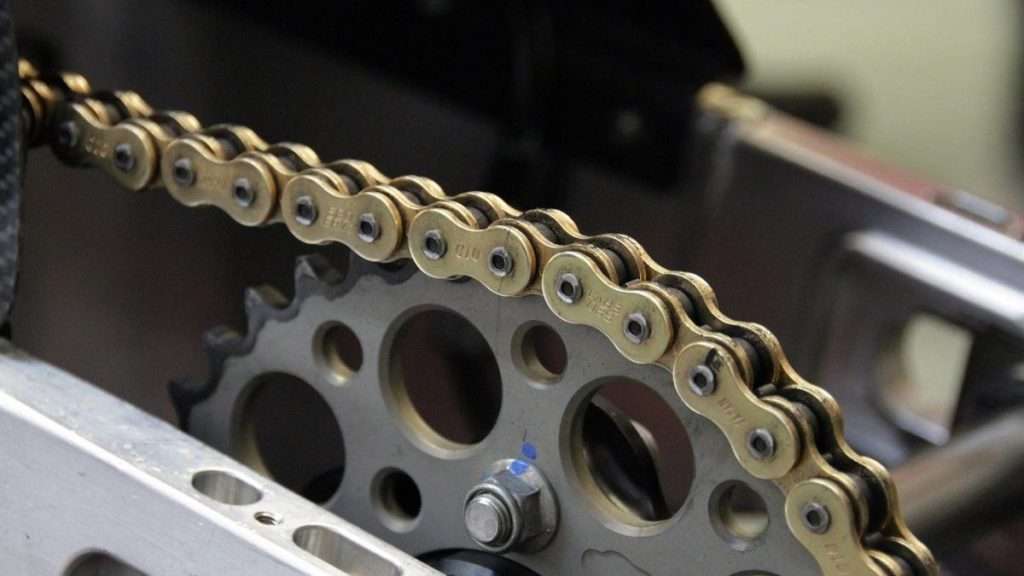
There is disagreement in the community about adding two master links together. Some folks say they’ve done it and have never had an issue, while others advise against it. It is likely safer to stick to just the one master link, but plenty of people have reported success adding more than one.
This is a decision that is in your hands and should be based on your own expertise. If you don’t consider yourself an expert, then it is definitely best to play it a bit safer and avoid adding a second one. If you’re in doubt, then check in with someone at the local bike shop.
Is It Worth Adding a Link To a Motorcycle Chain?
Once again, this is a matter of experience. If you are new to the world of motorcycles, then it may be best to consult a technician and replace the whole chain. However, it is always beneficial to learn more about your machine and perform basic maintenance yourself. Replacing a chain link is a doable process and a great way to start getting your hands dirty with your bike.
Sources:
https://www.youtube.com/watch?v=cmQBH0HkiM8
https://www.motosport.com/blog/x-ring-vs-o-ring-chain

 How To Clean A Motorcycle Chain | Best Kits Of 2020
  Can You Clean A Motorcycle Chain With That?
  Bavarian Brawler: 2021 BMW S1000R breaks cover
  The All-New 2021 Ducati Multistrada V4 is here. A more powerful V4 motor, radar-tech and much more!